Tuesday, June 14, 2011

Finishing up the Spots and Stripes - Tutorial Part 2

If you want to see the first part of the tutorial, go here!
OK, now that you've had a nice break, and your back has been rejuvenated, it's time to get back to work fun!
Your whole canvas should be covered in your stencil picture/shapes by now....but LIGHTLY!! (I can't stress this enough. If there's one thing I'm taking away from this it's that I need to barely, hardly, almost not at all, touch my pencil down.)
Now it's time to fill in the picture with COLOR!!
See the paint all over my fingers? It's all over my pants too! Also note the baby food jar - perfect for mixing up a small batch of a custom color!!

Kids can definitely help with this step too!
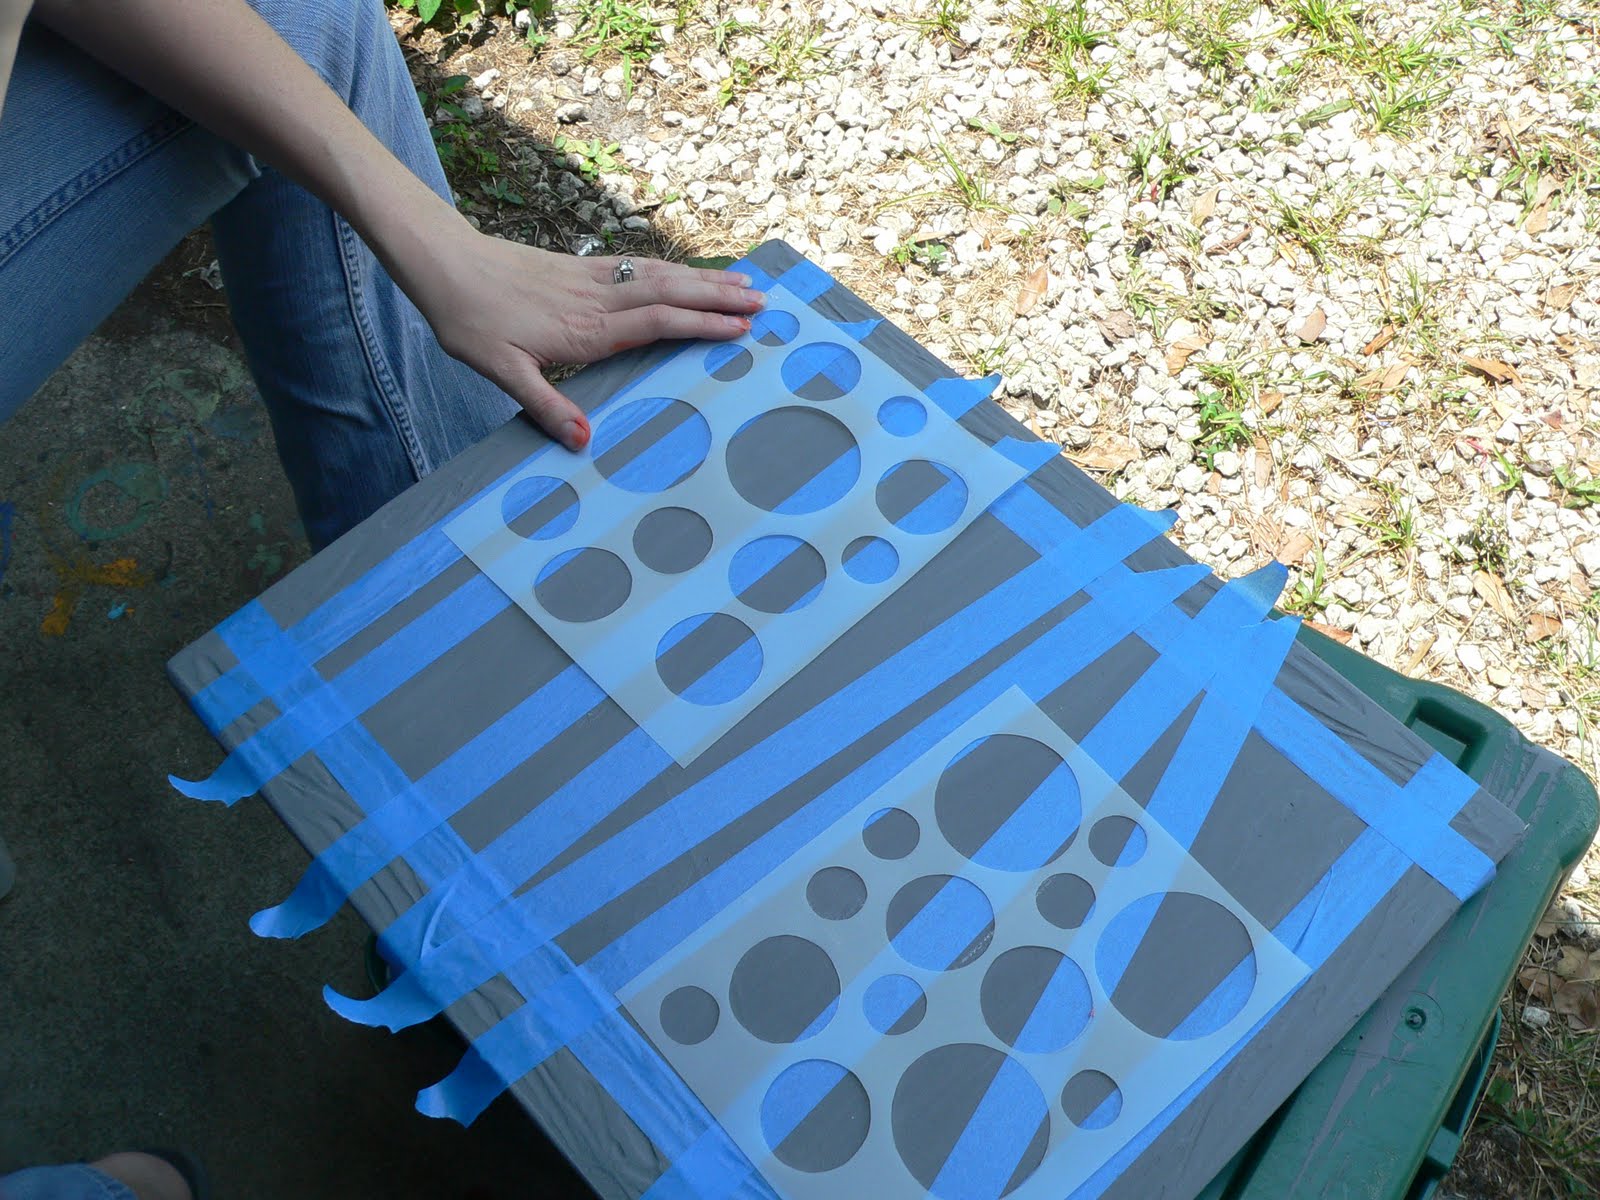
As you fill in the picture, rotate the canvas every once in a while. And don't forget about the middle of it! The middle needs color too! :-)
Don't worry about painting on top of the tape. That's what it's there for.
You will need to layer the paint in at least two coats. Just make sure to let the first coat dry before starting on the second. 
Once you are done with all the coats on the main part of the canvas clean up the smudges around the edges. If you're like us, it will be slightly messy!
Pretty purple....smudge. :-P

No more smudge!
 After all of the paint colors are on where you want them carefully pull off the tape. I HIGHLY suggest that after you get the edge of the tape off the canvas that you pull it backwards almost flat while pulling it off. This seems to almost cut through the paint that overlaps onto the tape to make a clean edge.
As you remove the tape the painting will be revealed...a glimpse of what it will look like finished!
See how the tape is nearly pulled flat backwards? You should definitely do that!
Touch up any areas that need it because of paint smudges, or the tape pulling up the paint, or pencil marks being left behind....(ugh.)
Let the paint fully dry. This shouldn't take more than 10 - 15 minutes. But you might want to take a longer break than that. Your back will likely hurt!
Once it is dry get out your paint pen. I would suggest you do this part, unless your child has a better eye and a steadier hand than you do! ;-)
I used Elmer's Painters in silver with a medium point tip.
Trace around the outside of the circles and along where the tape lines were. This is the perfect opportunity to sort of...fix the circles a little bit if needed. And before you know it, You're done!
There you have it! A fun and different painting that's very easy to do! You should give it a try too!!

Monday, June 13, 2011

Spots or Stripes?! A Painting Tutorial - Part 1

I had planned to already have this post up first thing this morning. Which would have been easy peasy if I had written it this weekend like I had intended. .....bbbuuuuutt That didn't happen. I have excuses! Wanna hear them!? I finished up a Tutu skirt and Daisy Do corset top to take pictures of (I had to make the corset top pattern, which takes a little time!), I had to run a few errands (like grocery shopping), I cooked breakfast on Saturday morning for my family then spent the rest of the day with them, I spent a little time at the machine on Sunday during the day, but also cooked a super yummy dinner (creamy potato and corn soup with chicken. YUM!! I'll have to share the "recipe" sometime!), and then last night I was hit with inspiration and set to work cutting out (but not yet sewing) a small line I'm calling "Americana" that will be ready to ship out and be received in time for the 4th of July. PHEW. Sooooo... Yeah. Plenty of excuses! Now that the excuse section is out of the way I'm going to dive into the tutorial. I'm making this a two part tutorial. Mostly because of all of the pictures! :-)
I found this picture at Goodwill for super cheap:
The picture is nothing to write home about. It's super thin board of some kind (particle board probably) surrounding styrofoam. So while it looks big and chunky, it's pretty light!
These are the necessary supplies:
A nice variety of paint colors (acrylic would be best)

Stencil of your choosing (We used two different circles stencils that I made)

1" painters tape

You will also need:
Paint brushes
Something to put paint in (paint pallet, paper plate, little condiment cups, clean baby food jars, Dixie cups, whatever you feel like using!)
Clothing you do NOT mind getting paint all over - for your child AND YOU!
Optional supplies:
Other widths of painters tape
Exacto Knife
Circle sponge brushes or whatever shape foam stamps you want to use
Paint pen or permanent market
Instructions:
First squirt a generous amount of whatever background color you would like. We decided a medium grey would be best so that our circle colors would stand out nicely.
Let your child spread the paint around your canvas of choosing with a nice wide/fat brush. If they are very young they might need help spreading it out evenly, and getting it onto the entire surface.
Notice her shirt and pants? Yes, we like to do painting projects around here!
We usually paint not only the entire face of the surface, but the sides as well. I would definitely suggest doing this with paintings you do with young ones since they are likely to be sloppy and get paint all over the sides anyway!
Let the paint completely dry!! This should not take very long if the paint was spread out thick enough to cover the picture underneath, but thin enough that it's drying in some places as you finish painting others. In the time it took Xarry to go rinse the paint brush, and me to mix up some fun new colors the paint was nearly dry. There was just enough time for Xarry to go inside and get a couple more paintbrushes that I forgot to bring outside.

Neat textured frame on the picture!
Once the paint is completely dry it's time to whip out the painters tape! Since our picture had a textured border, and Xarry wanted to keep the texture as-is, we taped off the "frame" part of the picture first. Once the outside "frame" was taped off I put strips of tape going across the canvas randomly. I did NOT measure how far apart I was putting the tape.
After putting down a couple strips Xarry asked if one could be "all crooked." So the rest of the strips of tape were all which ways of wonky.
Border taped off plus some random lines

Wonky lines added too!
Next take your stencil (If you're using one...or two) and draw draw draw draw draw those shapes!

Use a pencil to trace out the shapes.


Older kids can definitely get in on this step!
 Use a pencil to trace out the shapes. Do NOT use a finely sharpened pencil...but also not one that's super dull. If the pencil is too sharp you'll be too likely to poke your canvas (if you're using actual canvas) and if it's too dulled down the line ends up fat. Make sure to press VERY LIGHTLY!!! Even going across the tape lines. If you press too hard then the lines end up dark, even under where the tape is will be a visible line where you traced out the pattern.
See the circles?! They are kinda hard to see. But believe it or not, they were done too dark! We pressed too hard.
And now.... take a break! Even if you aren't following along with the tutorial today and both parts are already up...trust me. Take a break now! Your back, hand, and eyes need it!! Your child probably does too.
I can't wait to share the rest of the tutorial with you tomorrow! Stay tuned!

Thursday, June 2, 2011

Sewing Time Challenge

OK, so, I'm finding it a bit challenging lately to make time to actually SEW something. I have plenty of time to cut things out, but not sew said cut-out items together. My 4th grader nearly 5th grader just had her last day of 4th grade yesterday. *sigh* Time sure does fly!

Xarry looking all cute on her b-day in a 3G dress (plus shorts since we were at Universal).
On top of that, the baby-cakes got her cast off today (YAY!!!). Thank goodness it was only on for 3 weeks! She started using it like a club, and it started to STINK! Oy vey. That sucker almost made me pass out once or twice. (Both from getting bonked on the head, and from the smell. I had NO IDEA casts smelled so bad!)
Adi brushing her Xarry's hair yesterday. The last day with the stinky club cast on!
I'm thinking of making a tutorial on how to make some hair accessories. Maybe things like this...

A picture with her daddy...because it's just so cute I can't help myself.
What do you think? Interested in making one of your own? I just kinda threw that one together, and I can't even find where it went! But I can easily and quickly make another one and take pictures of the process, along with some words of advice on how to make it work. It only took about 8 minutes, maybe, to put it together. Interested?